
The horrors of wallpaper removal!
“Oh, we ‘just’ have the kitchen demo and wallpaper removal left!” Famous. Last. Words. Listen, I’ve had numerous people warn me about the terrors of removing wallpaper. Do you think I listened? No WAY! I’ve got this. With my garment steamer in one hand and putty knife in the other, bright-eyed and bushy-tailed, I attacked the first upstairs bedroom thinking I’d knock out most of the wallpaper removal in a day or so. Now let’s just pause for a second…all three upstairs bedrooms, upstairs hallway, two-story foyer, kitchen, and dining room all had wallpaper. Thank the GOOD LORD ABOVE, the previous owners chose random walls to wallpaper, so not every single wall in the aforementioned areas were wallpapered…only about 50-60% were. Thank you Jesus (insert praise hands)! In my ‘practical’, self-pep-talking mind, this wallpaper removal couldn’t take more than a few days, right?
WRONG.
SOOOOOOOOOOOO WRONGGGGGGGGGGGGGGGGGGGGGGGGGGG.
If any of you have removed wallpaper before, I want to provide a trigger-warning for the following content. This documentation of my struggle MAY induce bouts of post-traumatic stress! So, here we go. Like I just said, I was positive Polly about this behemoth monster of a project because I had no idea what I was getting myself into. I started steaming and scraping away, only to find the wallpaper in the room that I started with came off in teeny, tiny, minuscule shreds. I steamed, scraped, steamed again, and scraped some more. I thought, surely not every room will be like this. It has to be only this section of wallpaper. Once I get this part, the rest has to be a little easier! (Because GIRL, LET ME TELL YOU, it could NOT get much harder!)
Gabe was working in the next room and after a few hours passed, he came to make sure I was alive and to check on my progress. I proudly showed him the 1’ x1’ square I had removed in almost a half-day’s time! I was pretty proud. After all, it couldn’t all be this bad! Well, let me tell you, I married a realist and one of the most analytical human beings I’ve ever met (LOVE him to death, but we’re just calling it what it is). He took his shiny pin and popped my bright pink happy balloon, with the words “that’s all you’ve gotten done? There has to be a better way.”
Oh HECK no. Clearly, I, who have never removed wallpaper before, know exactly what I’m doing! Who is he to tell me that there’s a better way?
I banished him from my room of personal wallpaper hell and carried on. Needless to say, after a full day’s work, I had accomplished removing wallpaper from one single 3’ section of wall. Defeat overcame me.

Once I figured out that I could separate the impermeable top layer from the brown paper underneath, it came off easier!
The next day I returned to the house of eternal wallpaper hell and decided to take a different angle. Forget that awful room I was working on, I’m going to start in a different room! All of the rooms had different types of wallpaper, with different, lovely, floral and stripe designs, but one thing I quickly realized was all of the wallpaper was coated. This is exactly why the steam wasn’t working. It couldn’t penetrate the waterproof coating on the outside of the paper. Gabe was right… I had to do something different (eye roll). I discovered that in the second room I started on, I could peel off the coated part of the wallpaper in large sheets and separate it from the brown paper backing and adhesive on the walls. Now we were in business! The steam easily penetrated the paper once I had the top layer peeled off. The wallpaper came off pretty easily once I started using that method!
Great, right? No. It’s never that easy. In some areas, the wallpaper tore off primer, some drywall, some of it still stuck, some of it didn’t. In other areas, they put the wallpaper right on top of the dang drywall without using any primer or sizing to prep the walls, and yet in other areas, they wallpapered over what looked like another layer of unidentified paper!
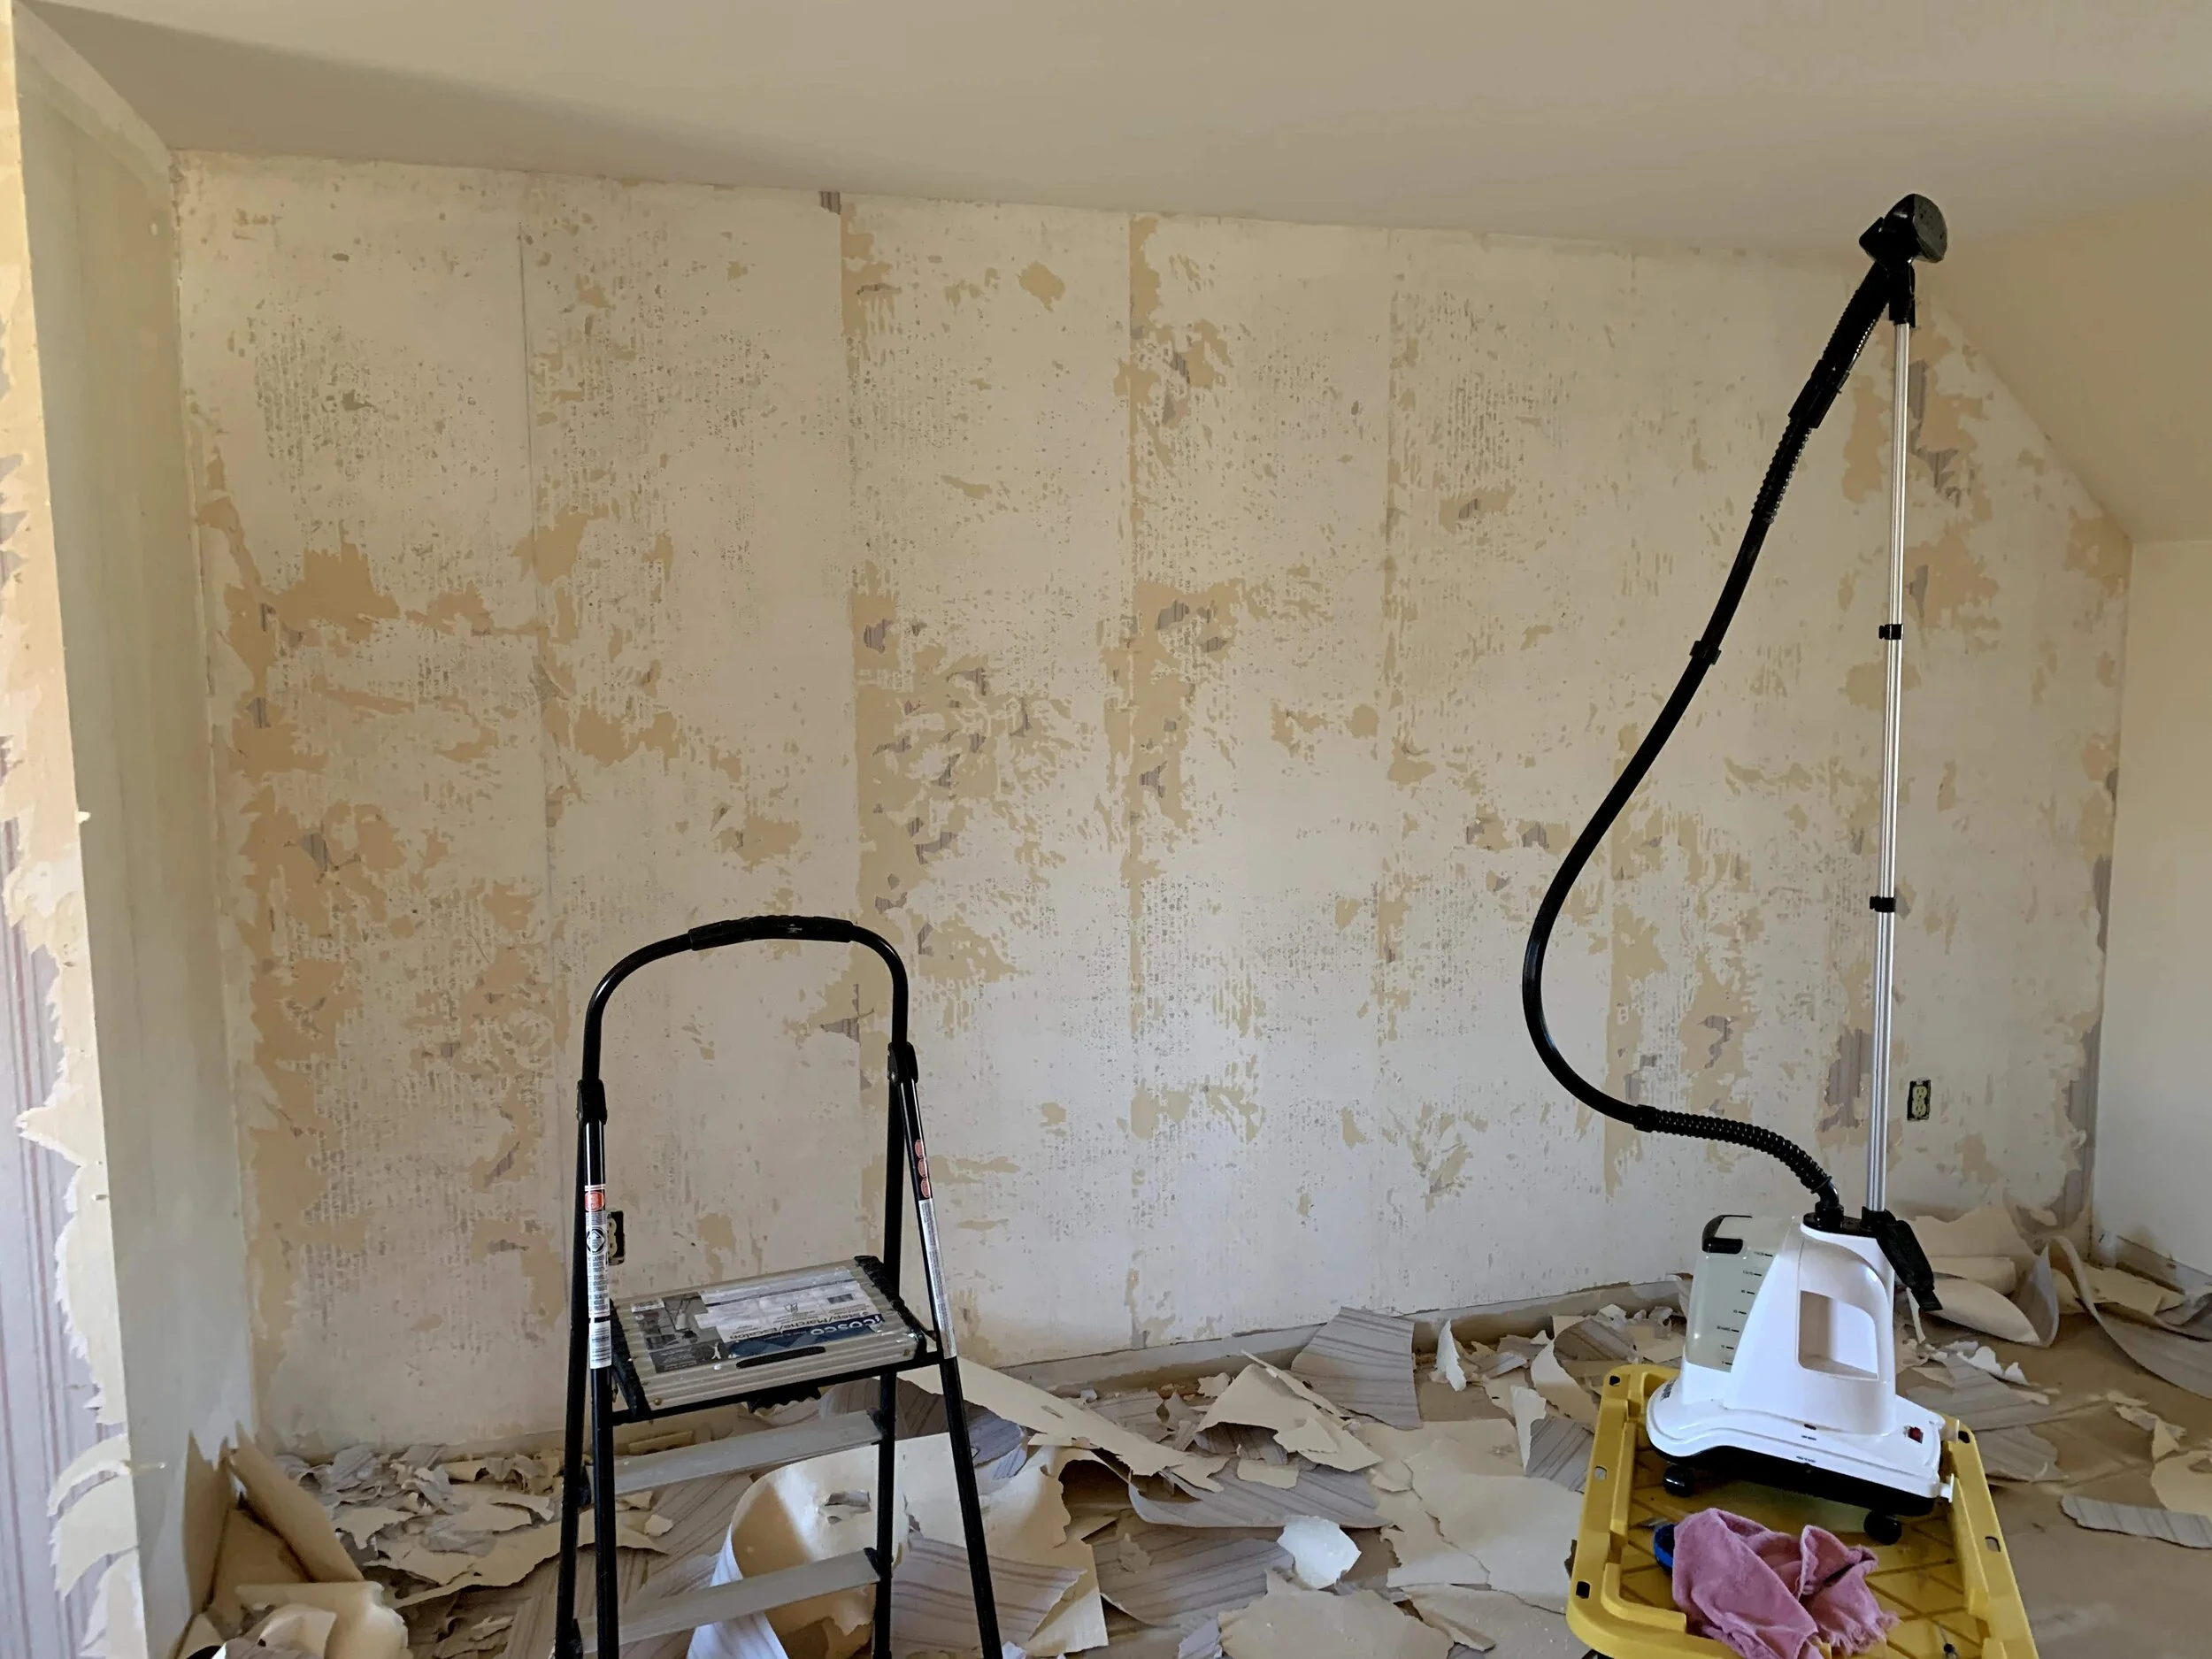
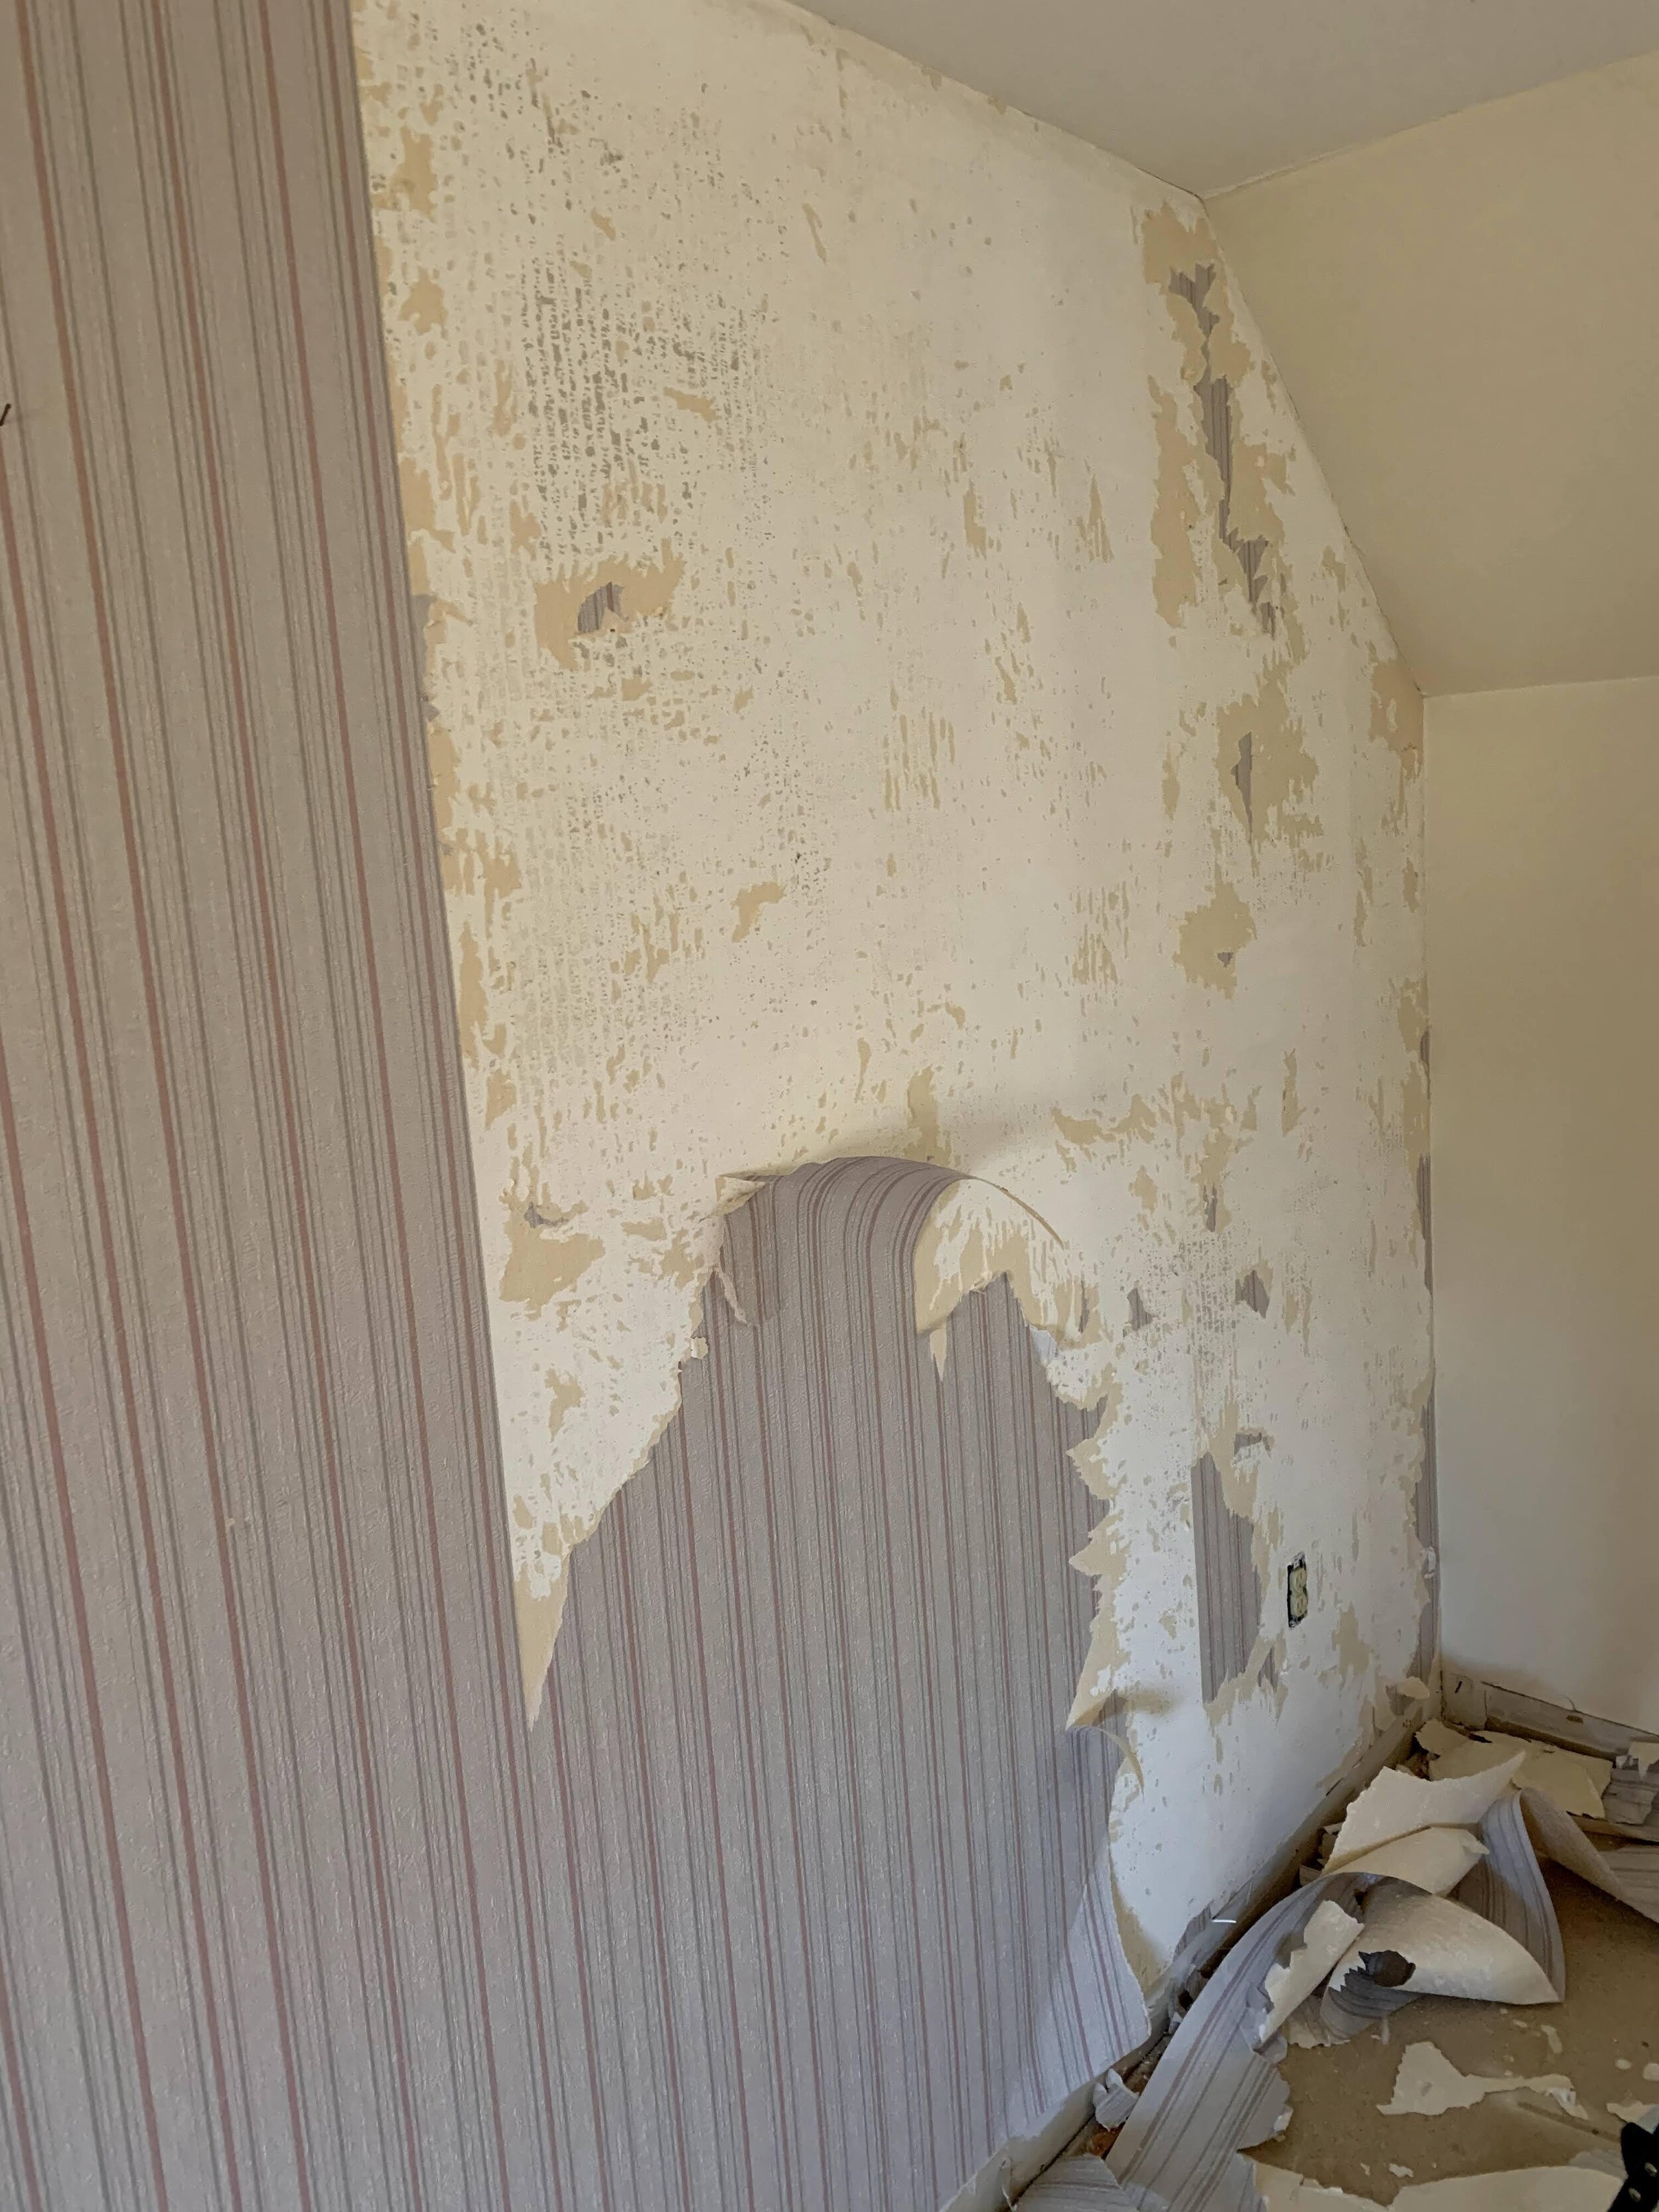
The aftermath of wallpaper removal

More aftermath…and lots of glue
Cuss words are not a part of my regular vocabulary (for the most part), but after this lovely experience, I might as well be a sailor because this was INSANE.
Fast-forward several weeks of agonizing wallpaper steaming, sick kids, and several holidays and out of town trips, I had the wallpaper removed! Smooth sailing, and ready for paint…or so I thought.
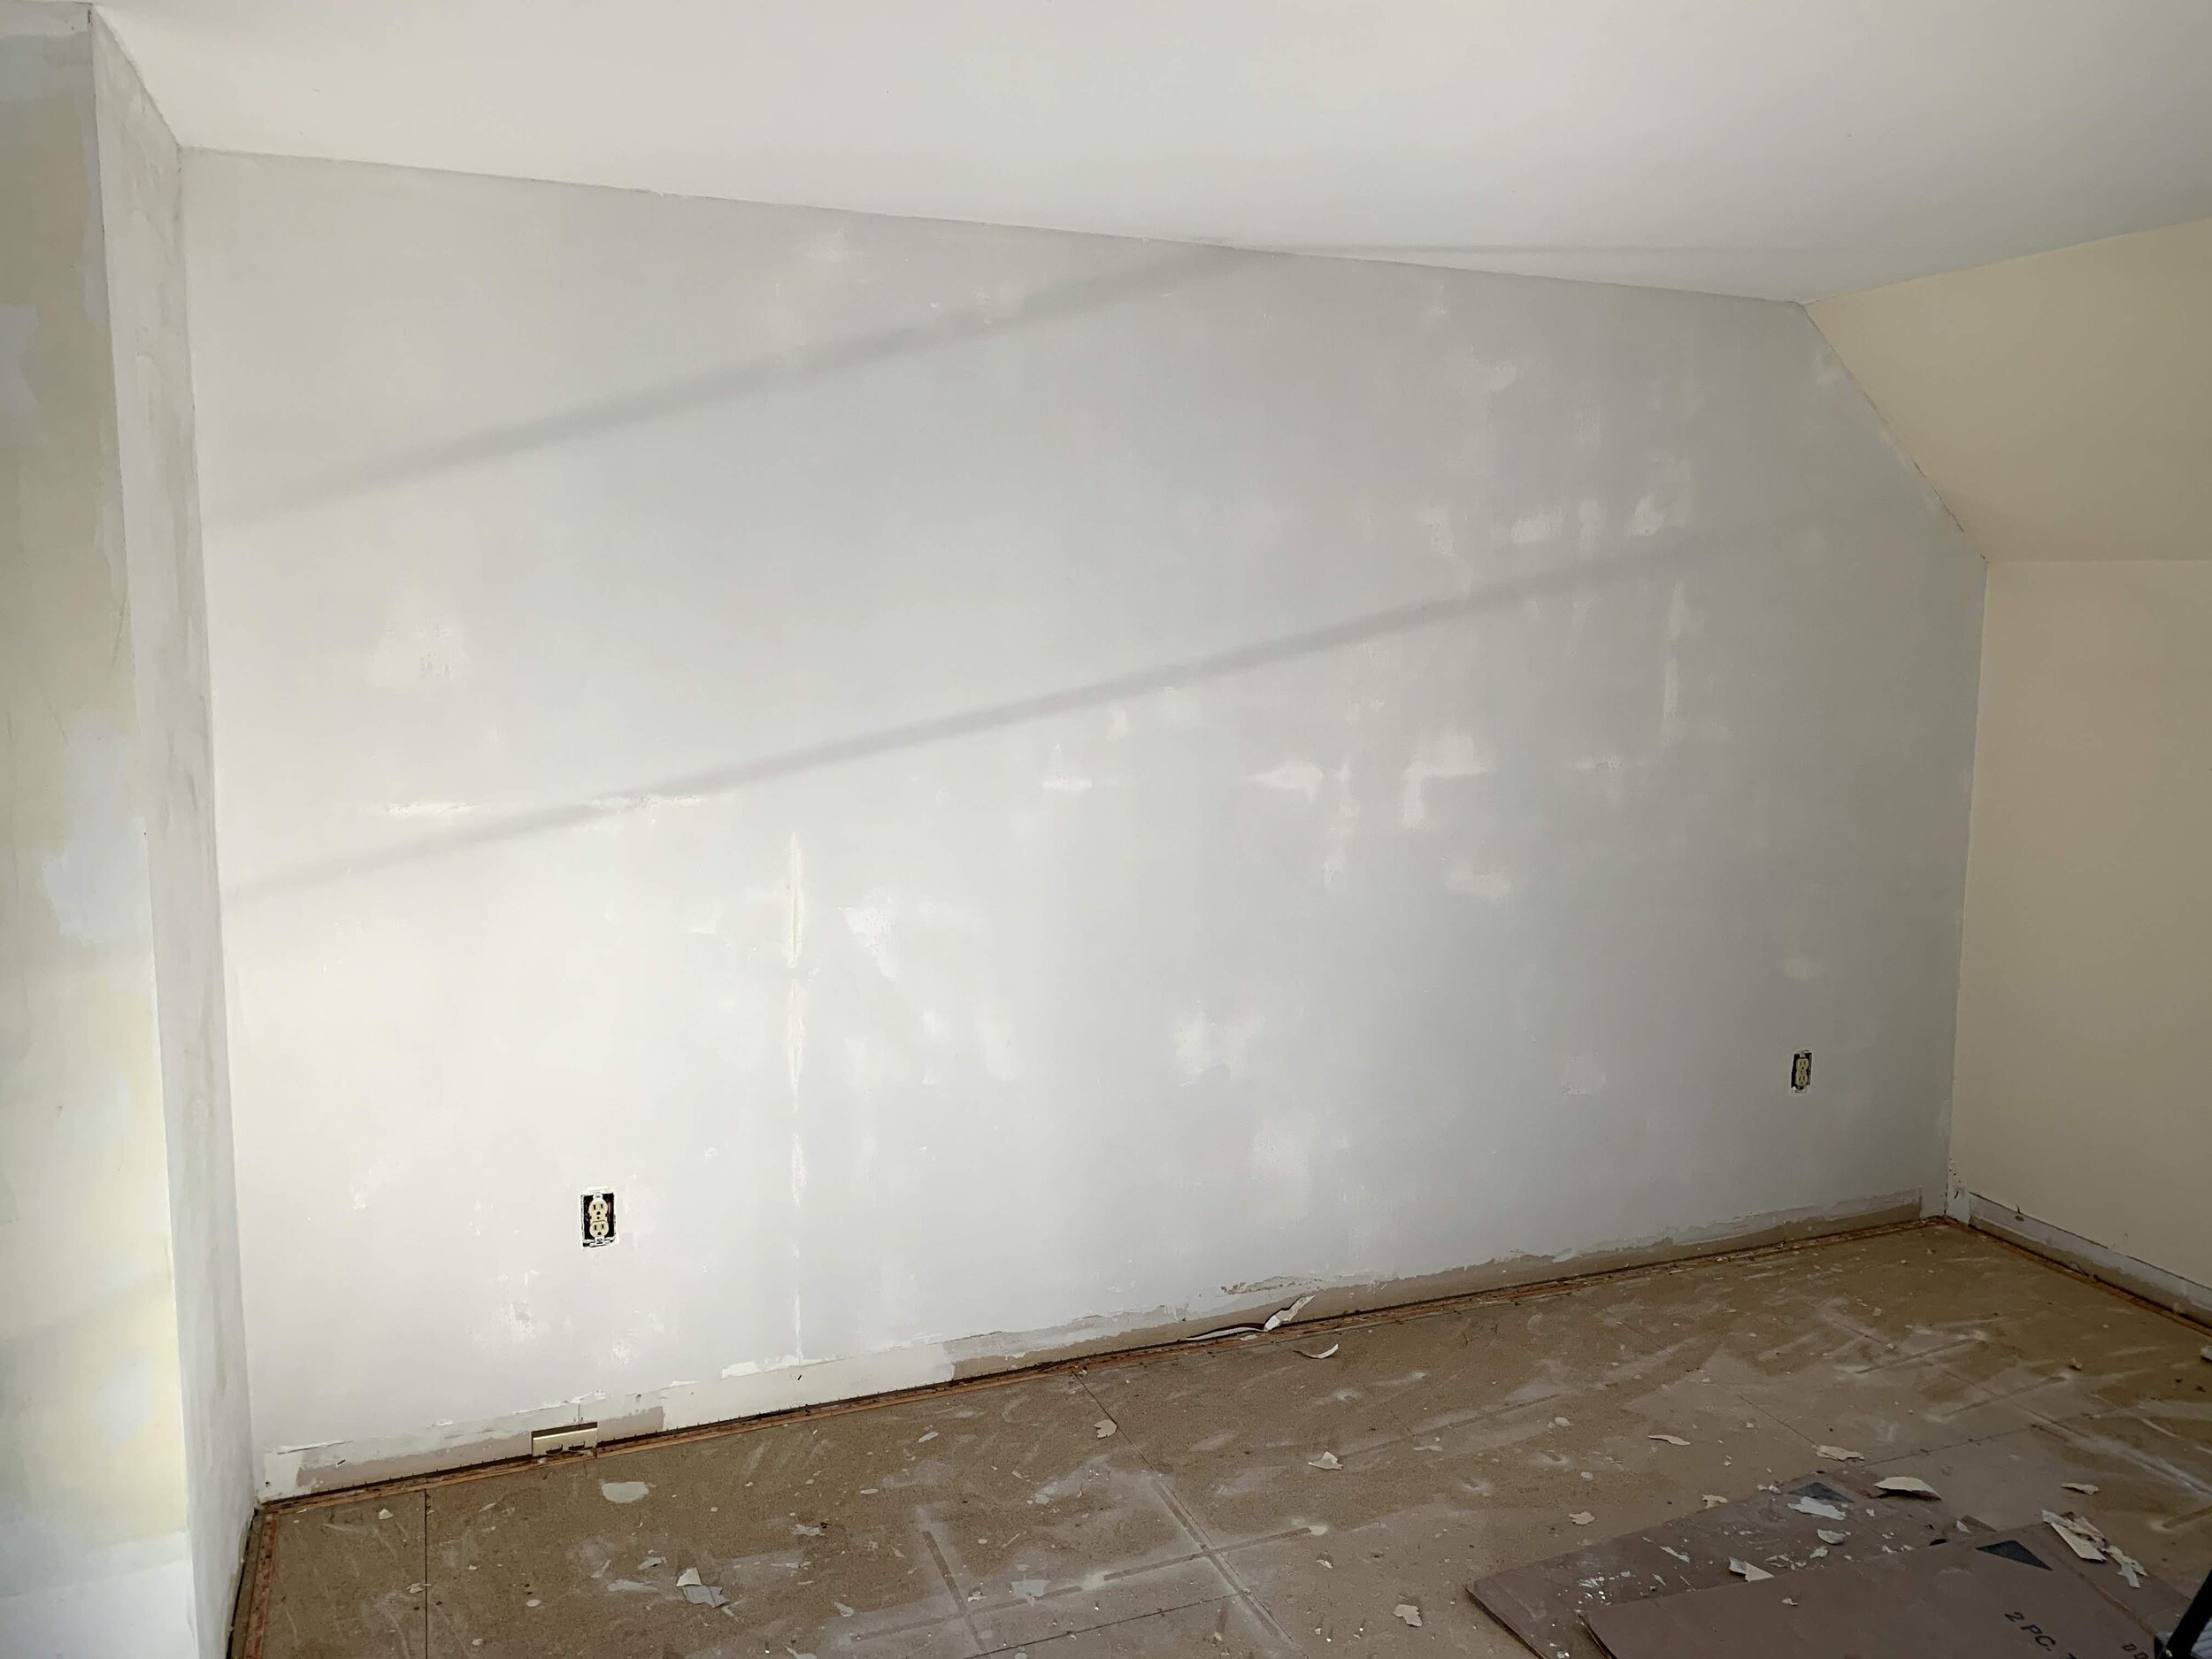
Looking much better after first skim coat of drywall compound
The glue. No one talks about the stupid freaking wallpaper glue. Once the wallpaper is gone, it LOOKS like it’s ready for primer, but no one tells you there’s this nearly invisible devil that still exists on the walls. If you use a latex paint or primer over the wallpaper glue, it reactivates the glue and once the paint dries, you have shiny spots. So, I referenced my trusty friend, Google. I found a few methods of removing the glue, so certainly one would have to work. First up, hot water and Dawn dish soap. This did nothing but smear the glue all over the wall. I even tried to use a scraper and scrape the glue after I went over it with hot water, to no avail. That method was out. Next, I tried a spray bottle with half hot water, half vinegar. Supposedly, the vinegar helps to break down the adhesive and it can be easily wiped away. Again, this only made the glue smearing problem worse. I was left with a sticky mess, and to boot, I was now taking off some of the drywall and primer (in the primed areas). Our last-ditch effort was to use joint compound and skim coat all of the walls to start with a fresh surface. This would essentially lock in all of the glue and give a smooth surface to paint on. Skim coating it was. This process took me several days just to do the 3 upstairs bedrooms, but short of hanging new drywall, this was the most practical and economical solution. We haven’t decided what we’re going to do in the other areas of the house that still have wallpaper glue on them, but we’ll cross that bridge when we get to it. The bedrooms are the most important right now so we can get paint on the walls, carpet installed, and shortly thereafter, move in.
The moral of this story, you ask? Friends, NEVER let friends wallpaper.